〈〈 Installing S.A.R.A.H. Including your first Thing 〉〉
The SCC is the heart of S.A.R.A.H., giving you the ability to visually create your home, add your Things, their bindings and generate the necessary config files. It will also allow you to manage many of S.A.R.A.H’s settings and to perform most of the necessary maintenance.
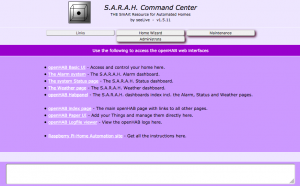
Starting with your Raspberry Pi plugged into the network and powered on, point your browser to http://sarah:8181/, from inside your home network, depending on your network configuration). It should look like this:
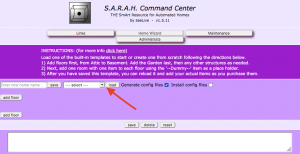
In using the ‘Home Wizard’ page, the idea is to create the template of your house and then to populate it with items (Things). The easiest way to start is to load one of the template files. Just click the dropdown next to the ‘Load’ button.
Pick one of the templates and click ‘Load’. Once loaded, add and remove Rooms and Things as needed, but keep the Floors in the order that they are. Floors must be in order of attic to basement and then the outside, top to bottom in the template. So, you can add and remove floors, but only if they stay in that order. When ready, type in a name for your home in the name field in the top left corner next to the ‘Save’ button and click ‘Save’. To save an existing template as a new one, load it, then type in a new name in the name field and click the ‘Save’ Button. If you happen to type in an existing name it will append a number to the name, so you don’t overwrite an existing one.
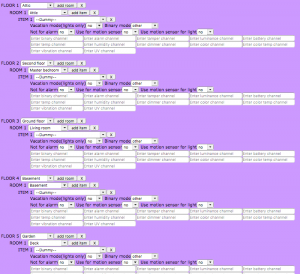
If you wish to create a template from scratch, you can either load the ‘Generic template’, or you can just start adding floors. You will add all your floors and then one room and one item in each room to start. From there, you will add rooms and items as needed. So, click ‘add floor’ for each of your floors and basement, if you have one. Include one floor for the attic, if you intend to ever automate it, and one for your garden or outside area (you only need one outside area or garden, you will populate it with the various ‘rooms’ later). Once you have your floors added, click the ‘add room’ button for each floor and click the ‘add item’ button for each room. Using the dropdowns for each floor and room select an appropriate name. Use “–Dummy–” for each item type for now. This will ensure you have a complete shell of your home.
If you have an attic, two floors, a basement and an outside area, you should have five floors showing, like this:
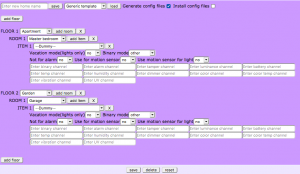
If you have an apartment with a garage that you wish to automate, you would have two floors, like this:
Now, enter your new home name in the field in the top left corner and click ‘Save’. Feel free to edit the template as needed – the X’s next to each entry will delete any entry you want to remove – but, keep the floors in order from Attic to Garden, top to bottom in the list.
N.B. You are currently limited to 15 floors, with 15 rooms, with 20 items in each. If you hit any of these limits you will not be able to add more. If this happens, and you have been deleting entries, you can reset the counts by saving your work and reloading it. But, this will only reset the counts if you have been deleting entries. If you actually have 15 floors, or 15 rooms, or 20 items, and you need to add more, please post a note on the blog and I will gladly increase the limits for you and send you the updated files. Just let me know. And, always remember to save your work!
Recent Topics
-
I upgraded or rebooted my RPi and now the sound doesn't work
By seeLive, 2 weeks ago
-
By seeLive, 2 weeks ago
-
Switches in BasicUI take two clicks to turn on/off
By seeLive, 4 weeks ago
-
Integrating your existing code into SARAH
By seeLive, 4 weeks ago


